
This tutorial covers the creation of menus using Visual Studio .NET and C#. Also it covers most of the properties of menus and menu items.
You can’t really name an application that doesn’t use a menu. Menus facilitate the navigation in an application because they don’t take up space, they are structured and therefore easy to access.
Menu bar
In MDI (Multiple Document Interface) applications, most of the time we see the File, Edit, View, Tools, Window and Help menus. You are encouraged to use the same names since Windows users expect to create/open a new file using the File menu, to edit the file using the Edit menu, change settings using the Tools menu and look for help using the Help menu. Also, along with this menus there will be custom menus specific for the application, for example in Visual Studio .NET there are Build and Debug menus which you won’t find in Microsoft Word.

Menus in Microsoft Word 2003
Context menu
Context menus also represent a shortcut to different actions in an applications, they are accessed by a right click of the mouse. In an application, context menus vary depending on which control the right click was made (hence the name).
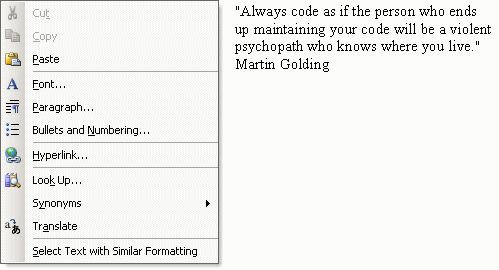
A context menu in Microsoft Word 2003 along with a neat quote.
Creating menu items in Visual Studio .NET
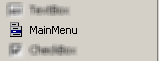
Open VS .NET, create a new Windows Application project and on the newly created form drag a MainMenu (mainMenu1) from the Toolbox:
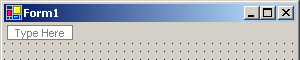
The MainMenu control is added to the form and if you click it on its instance icon below the form, the menu can be seen on the form:
Visual Studio .NET allows you to edit the MainMenu control very easily therefore there’s no reason for me to explain how to add menu items so that the menu will look like in the screenshot below:
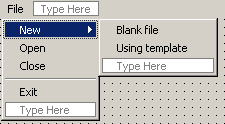
If you’re wondering how the line between Close and Exit was added: right click at the place where you want it to be inserted and choose Insert Separator.
Code in events for menu items can be easily created by double clicking the menu item. This will automatically create an event handler and connect it to the item’s event. For example if you double click Exit you’ll get at the following piece of code:
private void menuItem8_Click(object sender, System.EventArgs e)

{


}
Note that the name (menuItem8) may differ depending on the actual name of the menu item.
Add the following
code inside and now we have functionality implemented for the Exit item.
Application.Exit();Playing with the properties
DefaultItem – Make an item the default in a menu
An item from a menu can be made default, this way when you doubleclick the name of the menu the event for the default item in that menu will be executed.
For example change the DefaultItem property of the menu item named Exit to True. Now if you doubleclick the File menu the event for Exit will be executed, and therefore the application will exit. Also note that the Exit menu item is now shown in bold.
Enabled – Enabling / disabling a menu
Even if it’s straightforward I’ll mention how to do this. Select the menu and from the Properties window set the Enabled property to False. This property applies for menus and menu items.
MdiList -The Window List
MDI applications usually have a Window menu from where you can switch between windows opened in the MDI window.
Here’s the Window menu in Microsoft Word with 3 documents opened:
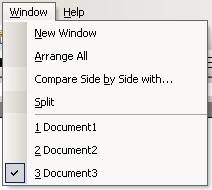
As you can see, along with menu items that create a new window or arrange the windows, after the separator there’s a window list. The window list is available in almost any MDI application. You don’t have to code anything to make your own window list in a Window menu, you only have to change a property.
First we need to make the form an MDI form.So having the form selected change the property named IsMdiContainer to True. Also we need to be able to create new forms inside the MDI form so we can see them in the Window menu. Creating new child windows inside an MDI Container is rather easy and it’s covered in the tutorial named ‘Using MDI‘. But you might not want to read another tutorial right now so we’ll cover the creation of new forms inside MDI here:
Double click the Blank File menu item located in the File -> New menu. You’ll get to a piece of code similar to this one:
private void menuItem5_Click(object sender, System.EventArgs e)

{


}
Inside it use the following code:
// Create a new form

Form standardFrm = new Form();

// Give it a title

standardFrm.Text = "Standard Form";

// Who's child is this window

standardFrm.MdiParent = this;

// Show it

standardFrm.Show();
Now let’s create the menu that holds the Window List.
Along with the File menu create another one named Window. Now, that the Window menu is selected from the Properties window, change the property named MdiList to True.
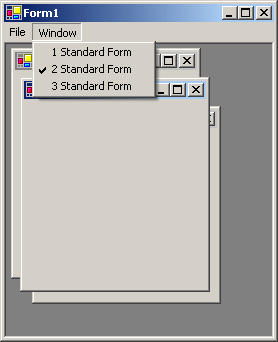
That’s it, now you can create new forms inside the MDI form using File->New->Blank File, and then view them using the Window menu:
OwnerDraw – Making your own design for the menu
As the MS documentation says, this property ‘Gets or sets a value indicating whether the code that you provide draws the menu item or Windows draws the menu item’. What does this help at?, you cry… well, if you want to make your own design for menus (perhaps other colors, size, borders and even an icon to the left) you’ll have to set this property to True. Customized design for menus is not covered here so we’ll skip.
This property applies for menus and menu items.
Shortcut and ShowShortcut – Set shortcut keys for menu items
Select one item in the menu (Open for example) and in the properties window look for the Shortcut property. As you can see, there is a dropdown list of shorcut keys you can choose from. The most appropriate for the Open item is CtrlO (Ctrl+O).
If the
ShowShortcut property is set to True, the shortcut key will be visible next to the name of the item:

Text – Changes the text of the menu and gives the posibility to create shortcuts
We already changed the name of the menu to File but I’m mentioning this property for another reason. Applications usually have a shortcut for accessing menus (and I don’t mean menu items which we discussed above, those are different types of shortcuts). You can access the menus by pressing Alt+ a character on the keyboard, usually the character beeing the first letter of the menu’s name. But I’m probably just boring you as you already know this.
So, in our case, for the File menu, the combination should be Alt+F. To set this combination change the current Text property of the menu from File to &File.

Now you can activate the menu by using the Alt+F combination.
This types of shortcuts can apply for items of the
Visible – Makes a menu item or an entire menu visible or not visible
It does exactly what it says. You might use this property sometimes at runtime, perhaps giving the user the posibility to hide some of the menus he doesn’t need.
Note that not all properties have been covered in this tutorial for several reasons. For example MergeOrder and MergeType were not covered because they need a whole new tutorial.