This tutorial will show you how to retrieve information about your graphics display adapter, such as name, driver version, current resolution and refresh rate and supported resolutions and refresh rates. All this is done by using the DirectX 9 SDK.
This tutorial is meant as an introduction to working with DirectX 9 and C#. A practical use of the code here would be in a DirectX game that needs to retrieve information about available display adapters, resolutions, color depth, etc. Before starting, you need the DirectX 9 SDK which can be downloaded from Microsoft. More details on the MSDN website at http://msdn.microsoft.com/directx/.
Now that you have DirectX 9 SDK installed, fire up Visual Studio 2003 and create a new Windows Application project. Right click References in the Solution Explorer and click Add Reference. We will be adding two new references, one to Microsoft.DirectX and one to Microsoft.DirectX.Direct3D. Now, before we start coding, add two using directives:
using Microsoft.DirectX;

using Microsoft.DirectX.Direct3D;
This way we won’t have to write really long lines of code.
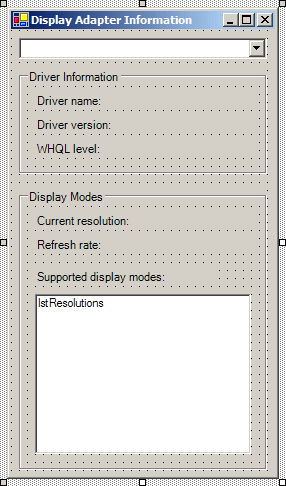
Since the form contains numerous controls, and especially labels, I won’t enumerate all of them here, instead I will let you add them based on the below screenshot. Or if you wish to get it done even faster, just use the project attached to this tutorial.
First we want to populate the ComboBox with a list of the system’s display adapters. We want to do this in the load event of the form:
private void Form1_Load(object sender, System.EventArgs e)
{
   foreach(AdapterInformation AdaptInfo in Manager.Adapters)
   {
      cmbAdapters.Items.Add(AdaptInfo.Information.Description);
   }Â
   cmbAdapters.SelectedIndex = 0;
}Using foreach we loop through Manager.Adapters to add the name of each adapter to the ComboBox. Also, we select the first item in the list, therefore firing the
SelectedIndexChange event of the ComboBox. Now inside the SelectedIndexChange event is all the code we need to get additional information about the adapter:
private void cmbAdapters_SelectedIndexChanged(object sender, System.EventArgs e)

{

   // Get the index of the currently selected adapter

   int SelectedAdapter = cmbAdapters.SelectedIndex;
   // Get driver name and version

   lblDrvName.Text = Manager.Adapters[SelectedAdapter].Information.DriverName.ToString();

   lblDrvVersion.Text = Manager.Adapters[SelectedAdapter].Information.DriverVersion.ToString();

   // Wether the driver is WHQL signed or not (0 means is not)

   lblDrvWHQL.Text = Manager.Adapters[SelectedAdapter].Information.WhqlLevel.ToString();

   // Get the current resolution

   lblCurrRes.Text = Manager.Adapters[SelectedAdapter].CurrentDisplayMode.Width + "x" + Manager.Adapters[SelectedAdapter].CurrentDisplayMode.Height;

   // Get the current refresh rate of the adapter

   int RefreshRate = Manager.Adapters[SelectedAdapter].CurrentDisplayMode.RefreshRate;

   // A refresh rate of 0 indicates adapter default refresh rate

   if(RefreshRate > 0)

   {

      lblRefreshRate.Text = RefreshRate + " hertz";

   }

   else

   {

      lblRefreshRate.Text = "Adapter default";

   }

   // Loop through all supported display modes of the adapter

   // and add them to the ListBox

   foreach(DisplayMode DisMode in Manager.Adapters[SelectedAdapter].SupportedDisplayModes)

   {

      lstResolutions.Items.Add(DisMode.Width + "x" + DisMode.Height + ", " + DisMode.RefreshRate + " hertz, " + DisMode.Format);

   }

}
Here’s what the application shows on my system:
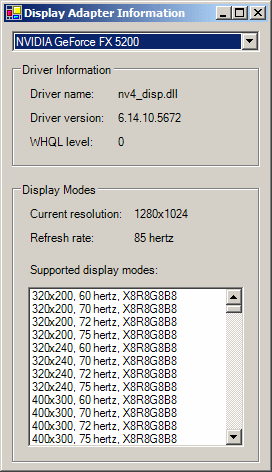
Probably you’re wondering what X8R8G8B8 is. This is the format of the specified display mode. Knowing the format is important when developing applications with DirectX, such as games, since it needs to be valid for back buffers. This doesn’t make a lot of sense if you never dealt with back buffers, but it will be clear once you’ll have to use it.
A good thing to know about the format, is that if you add the numbers in it (8+8+8+8 in X8R8G8B8) you get the color depth, 32 bit in this case. Same way, adding the numbers in R5G6B5 will return 16, thus a 16 bit color depth.
If you’re curios what the letters stand for, here you go:
A - Alpha

B - Blue

G - Green

R - Red

X - Unused
There are a few more letters I won’t be mentioning here for the sake of simplicity.
To make matters a little bit more complicated: each number after each letter defines the number of bits allocated for each letter. In the case of R5G6B5 we have 5 bits in red, 6 bits in green and 5 bits in blue. While in X8R8G8B8 we can see that we have 8 unused bits, 8 red, 8 green and 8 blue.


