This tutorial will show you how to lock your PC, put in stand by, hibernation or log off the current Windows user. For achieving this we use both managed C# code and calls to the unmanaged user32.dll library.
We’re going to create a sample Windows application which will be capable of locking the PC using the existing station locking feature in Windows XP, put the operating system in Stand By and Hibernation, and finally logging off the current user.
Let us start by creating a Windows Application project inside Visual Studio 2005. Our code is compatible with Visual Studio 2003 as well, only that the project attached to this tutorial was created inside Visual Studio 2005 and it will open only in this version.
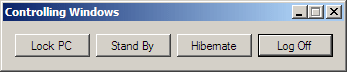
To our newly created form, drag 4 buttons entitled btnLock, btnStandBy, btnHibernate and btnLogOff.
Locking the operating system session Let’s start with the first button, which is supposed to lock the user’s current session by prompting for a password. For doing this we will need to call a piece of unmanaged code that resides inside a well known Windows API library – user32.dll.
S witch to code view, and add the following using directive, since we’ll be calling the user32.dll unmanaged code library:
using System.Runtime.InteropServices;Now we have the using statement in place we’re ready to import the DLL and define the function which we want to use. And that function is LockWorkStation():
[DllImport("user32.dll")]
public static extern void LockWorkStation();
The next step is to double click the btnLock button (Lock PC) to create its Click event handler, and inside it we use this single line of code:
LockWorkStation();That’s all you need for locking the operating system: to call a function. All we did was to import the user32.dll from the System32 directory into our code, so that we can call the LockWorkStation() function.
Putting the system in stand by and hibernation If you thought locking the operating system was easy, check out putting the operating system in stand by and hibernation. To do this we don’t need to call an unmanaged function anymore, because this feature is supported by the .NET Framework.
To test this, double-click the btnStandBy button and inside the Click event handler that was just created, use the following line of code to call the SetSuspendState method:
Application.SetSuspendState(PowerState.Suspend, true, true);The first argument – PowerState – defines the type of power mode to which you want to switch. In our case we want the Suspend power mode (equivalent to Stand By). The second parameter specified wether we should forcely suspend the operating system and its applications, or if we should send a Suspend message to each opened application and wait for their action. The third and last parameter specifies wether or not you want the system to exit the suspended power mode on a wake event (which can be sent by a device, for example). If set to true, the system will not be able to wake up when a device requests so.
The only different for Hibernating is that we’re using PowerState.Hibernate instead. Thus, you should double click the btnHibernate button and inside the event handler place the following line of code:
Application.SetSuspendState(PowerState.Hibernate, true, true);Log off the current user So now you want to log off the current Windows user programatically. To do that we’re going to get back to using the user32.dll file from the Windows API, so if you haven’t placed the using directive yet, as we did for locking the workstation, do that now:
using System.Runtime.InteropServices;Now import the user32.dll once again, this time so we can use the ExitWindowsEx() function, as shown below:
[DllImport("user32.dll")]
public static extern int ExitWindowsEx(int uFlags, int dwReason);
Depending on the flag we pass to this function we can log off, shut down, forcely shut down, reboot and power off the computer. However, we’re only going to log off the current user. The reason why we’re not going to see how you can shut down or reboot the operating system, is that it gets more complicated than just calling the function with a different argument, since you’ll first have to obtain the necessary permission from the operating system. This will probably be the subject of another tutorial.
Now back to logging off the user, what’s left to do is to double click the Log Off button (btnLogOff) to get to its Click event handler.There you will have to use the following line of code to call the ExitWindowsEx() function:
ExitWindowsEx(0, 0);The first flag defines that we want to do a log off, and the second is for defining a reason for this action (maintenance, software update, etc.).
Please note that these methods were only tested in Windows XP Home and Professional environments, however they should work on any systems that have .NET Framework installed.


