
So you have just installed IIS and the includes are not working and you do not know what a Virtual Directory is! Hmmmm! This tutorial will help you set up virtual includes on IIS 5.x.
How to Use Include Tag in IIS 5.x
To include a HTML or Text or .inc file within an ASP file is no problem.
You can use the follwoing tag to include a file called abc.inc in you
foo.asp file:
<!--#include file="abc.inc" -->The file that you will be calling through the browser is an ASP file (abc.asp) and IIS knows how to handle INCLUDE in a ASP file.
Now Lets say that there is a file that you would like to include on all pages of your website which reside is different directories. Well for this we will have to use the VIRTUAL include.
To be able to use the virtual includes, we need to setup a virtual directory.
In the following example I will setup a virtual directory called TEST
(c:\Inetpub\wwwroot\test).
Go to Start > Settings > Control Panel > Administrative Tools
Internet Information Services
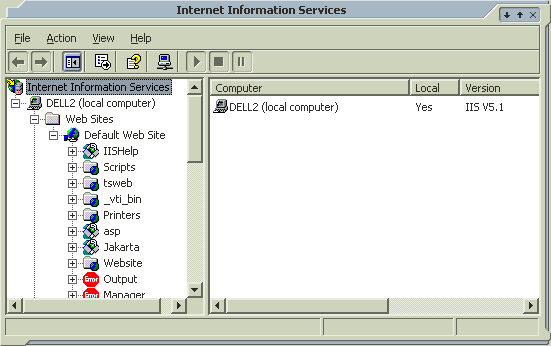
Double Click it and you should see something like this:
Now scroll down to the folder you created (TEST) and Right Click on it
New > Virtual Directory. After doing this your test folder will look something like this:
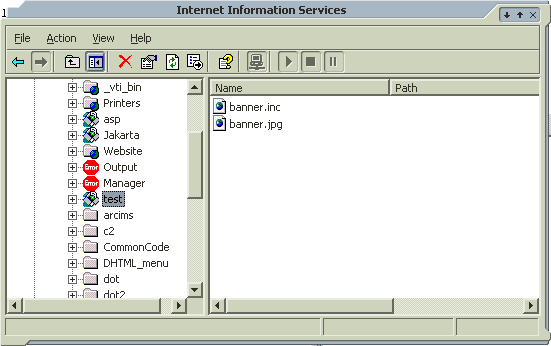
Great! Now we have created a Virtual Folder and if you look at the image above you will see that I have 2 files in folder. These files were in the TEST directory when I started making the virtual folder.
Now I want to include the file called banner.inc in all of ASP and HTML files. To include this file in ASP you will now write a include statement like this:
<!--#include virtual="/test/banner.inc" -->NOTE: Never put “../” or “./” in the include statement. It will not recognize it.
Now to include banner.inc in your HTML files you will use the same include tag but first you have to tell your webserver to look for the include statement in your HTML files. For this Right Click on the virtual directory that we created “TEST” and select Properties. You will get a window like this
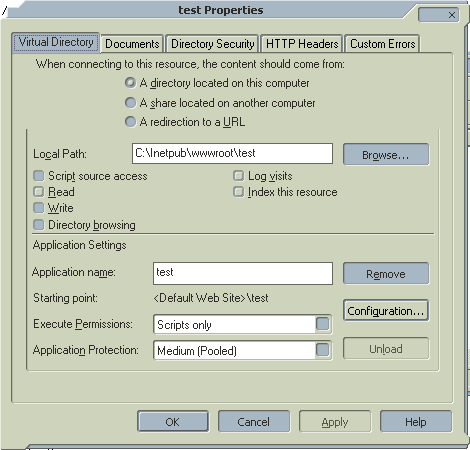
In this window click “Configuration…” and you will see another window like this:
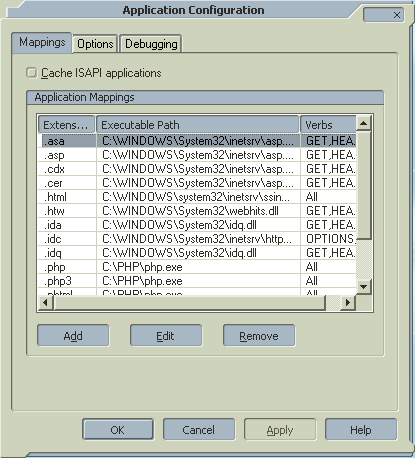
Click on the “Add” button and then click on “Browse” in the next window. Select the file called ssinc.dll from your c:\windows\system32\inetsrv folder.
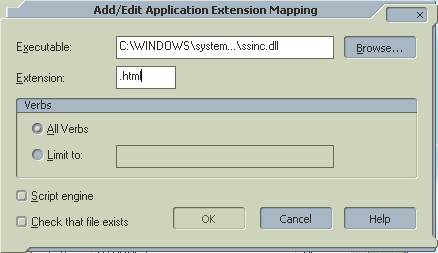
Now comes the tricky part. In the Add / Edit Application Extension Mapping Window you might have noticed that the OK button is not enabled. Well this is a BUG in IIS 5.x. The remedy is to click on the Executable Text area after typing in the Extension. You will notice that the entry
“C:\WINDOWS\system…\ssinc.dll”
will expand and will become
“C:\WINDOWS\system32\inetsvr\ssinc.dll” thus enabling your “OK” button.
Click OK, Refresh your webserver. Create a .html file and include the following tag to include banner.inc
<!--#include virtual="/test/banner.inc" --!>Now you should be able to see the output of banner.inc within a HTML
file.
-Happy ASPing


