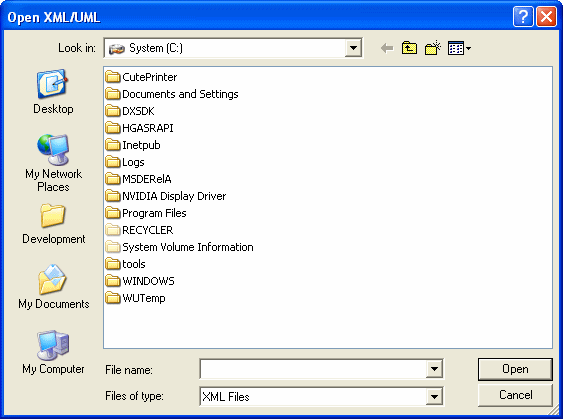
Use the classic Windows dialog box to choose a file for opening, also tells you how to open multiple files.
In almost any program that uses files you need the OpenFileDialog, it’s the classic Windows dialog that lets the user choose a file (to be opened in your application perhaps).

Start a new Windows Application project and drag a button, name it whatever you want. Double click it so we can get to the Click event.
First we need to create a new OpenFileDialog:
OpenFileDialog fDialog = new OpenFileDialog();Now we set a few properties. The title of the OpenFileDialog window:
fDialog.Title = "Open XML/UML File";The filter, which only allows the files with the name or extension specified to be selected. Here we allow to be opened only files with the .xml and .uml extension:
fDialog.Filter = "XML Files|*.xml|UML Files|*.uml";And now we set the InitialDirectory property which is a bit self-explanatory I think…
fDialog.InitialDirectory = @"C:\";Now we check to see if the user has clicked the OK button after choosing a file, if so we display a MessageBox with the path of the file:
if (fDialog.ShowDialog() == DialogResult.OK)

{

MessageBox.Show(fDialog.FileName.ToString());

}
If you want to select multiple files just set the Multiselect property to true and to return the name of the files use fDialog.FileNames instead of fDialog.FileName. This will return a string array with the name of the files.
There are some other properties you can set.
If a user types the name of a file but doesn’t specify the extension you can set the AddExtension property to true:
fDialog.AddExtension = true;Also, if a user types the name of a file or path that does not exist we can give him an warning:
fDialog.CheckFileExists = true;

fDialog.CheckPathExists = true;
Sometimes you may want to sent an initial directory where the dialog will open:
fDialog.InitialDirectory = @"C:\Windows";If you want to have a Help button on the dialog you only need to set a property:
fDialog.ShowHelp = true;Of course, if you want to use the Help button you’ll need to handle the HelpRequest event.


