How to create a StatusBar, use it for displaying text into it or use it with panels (StatusBarPanels).
StatusBars are used in many applications as they provide information about the current state of the program or about different controls on the form, like when you point your cursor over a button or a menu item and in the StatusBar a short description about that control is shown.
In this tutorial we’ll cover the basics that you need to know when working with StatusBars.
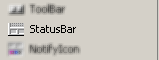
Add a StatusBar to a form from the Toolbox:
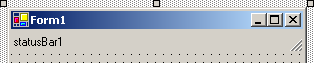
The StatusBar named statusBar1 is added to the form:

Let’s take a look at some of its properties:
Dock – Change the dock location
You usually see a StatusBar at the bottom of a window. That’s why the default value of the StatusBar’s Dock property is set to Bottom. But you can dock the StatusBar to any other place, although it’s not recommended, the place of the StatusBar is at the bottom.
StatusBar foolishly docked
Panels – Use the StatusBar to display text or panels
This is probably the most important property. If the boolean value is False the StatusBar will display only text, if it is True, the StatusBar will display panels. We’ll cover this later in the tutorial.
SizingGrip – Whether the panel has a sizing grip which allows resizing or not
The Sizing Grip is this little thing:

Grabing it, you can resize the form. Even if this property is set to False and the SizingGrip isn’t shown, the Form still can be resized by grabing the edges (of course, if the Locked property of the Form is not set to True 🙂).
Text – Change the default text of the StatusBar
This is the text that is displayed in the StatusBar by default. You’ll want to change this to “” (i.e. nothing/blank).
StatusBar Text
As I mentioned earlier at the Panels property, the StatusBar can display either text or use panels. By default the StatusBar displays text (i.e. the Panels property is set to False). Let’s see an example of how you can use the StatusBar for displaying text.
On a form with a StatusBar statusBar1 add a TextBox textBox1. Now double click the TextBox and we get to the textBox1.Text_TextChanged event.
Inside, use the following code:
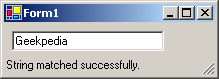
if(textBox1.Text == "Geekpedia")

{

   statusBar1.Text = "String matched successfully.";

}

else


{

   statusBar1.Text = "String does not match.";

}
If you enter the string ‘Geekpedia’ in the TextBox, the StatusBar will be display ‘String matched successfully.’, if not, the StatusBar will display ‘String does not match.’.
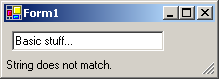
This is all basic stuff…
StatusBar Panels
Many applications that have a StatusBar use Panels to divide the StatusBar in multiple parts where it can display different information about the application.
Here’s the StatusBar of Internet Explorer:

In the first panel the icon of the file type is displayed (html file in this case) after which you can see the URL to which the link I’m pointing at is linking. Also this panel displays the current browser state, for example when loading a webpage it displays (Opening page http://www.geekpedia.com…) and next to it another panel appears that displays a progress bar. After one empty panel (which also displays something when needed) there’s one which has an icon. This icon tells us that popups from that page were not blocked (IE popup blocker is available with Windows XP SP2).
The last panel displays the current zone.
Now that you are familiar with panels let’s create some.
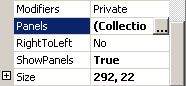
As I stated earlier in the tutorial we do this using StatusBar’s properties. Set the ShowPanels property of the StatusBar to True and then click the … button next to Panels property:
The StatusBarPanel Collection Editor shows up. Here you can add new panels. Click the Add button twice so that two panels are added to the StatusBar (statusBarPanel1 and statusBarPanel2).
From here you can also set some properties for the StatusBarPanels. For example the ToolTipText property, which works like this:

Also from here you can set the width of the panel which by default is 100.
The BorderStyle property is by default set to Sunken which is the most common.
The AutoSize property can be set to None (the size of the Width property), Spring (shares the space with the rest of the panels which have this property set the same) and Contents (fits the content).
Now, if for example you want to display the state of the string entered in the TextBox (‘String matched successfully’ and ‘String does not match’) in the first panel because in the second you want to display something else, you just have to replace StatusBar1 with StatusBarPanel1.
The changed code now looks like this:
if(textBox1.Text == "Geekpedia")

{

   statusBarPanel1.Text = "String matched successfully.";

}

else


{

   statusBarPanel1.Text = "String does not match.";

}
And the result is this:

The status is now displayed in the desired panel
I’m sure you find the StatusBar a control that’s easy to work with.
Tthis tutorial guided you throught the basics. Soon, a tutorial covering the creation of a ProgressBar inside a StatusBarPanel will show up, which I think it will be more interesting 😉 .


