Learn how to create an application that reduces the quality of JPEG pictures from a folder and then puts the new pictures into another folder.
Changing the picture quality of a JPEG file In this C# programming tutorial we’re going to create a quite useful little application – one that takes every JPEG picture in a folder and changes its quality to a desired rate, which obviously reduces the size of the JPEG file. Thus, aside from using an encoder to reduce the quality of the picture, you’ll also learn how to scan a folder for files of a certain type, and put them in a ListBox.
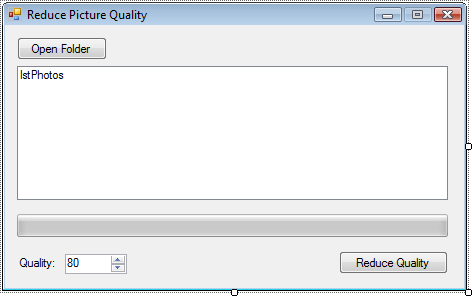
Designing the application Fire up Visual Studio 2005 and start a new C# Windows Application. On it draw two buttons – btnOpen and btnReduce – they will be used to select the folder where you want to look for the pictures to be modified, and the folder where the modified pictures will be stored. The big control on this page is the ListBox control named lstPhotos, it is where the list of files to be reduced in quality will be stored. Then there’s numQual – a NumericUpDown with values of 1 to 100 – which will define the quality to which we want the pictures reduced. Finally the last control to add to the form is prgReduce – a ProgressBar that keeps track of the progress made in resizing all the files. You will see that the progress bar works quite fine, even though we’re not going to use a separate thread for the picture reducing code.

Remember when I said we added our last component to the form? I lied. We still need the two dialogs that fire up when the btnOpen and btnReduce are clicked. They allow the user to select the folder where they want the files to be picked up from, and where the new ones are to be dropped. These two are FolderBrowserDialogs and are named as follows:

The code behind the application Since we’re going to be working with graphic files and directories, the following two using statements are appropriate:
using System.IO;

using System.Drawing.Imaging;
Our code is divided into two: the scanning of the folder from where we pick up the pictures, and the quality reducing and file saving code. The first part happens inside the click event of btnOpen:
private void btnOpen_Click(object sender, EventArgs e)

{

    if (fbdOpen.ShowDialog() == DialogResult.OK)

    {

        // Clear any previous items in the list

        lstPhotos.Items.Clear();

        // Run a loop through all the files in the directory at the selected path

        foreach(string Filename in Directory.GetFiles(fbdOpen.SelectedPath))

        {

            // We'll create a new FileInfo object from the file path

            FileInfo fiPicture = new FileInfo(Filename);

            // If it's a JPEG file

            if (fiPicture.Extension.ToLower() == ".jpeg" || fiPicture.Extension.ToLower() == ".jpg")

            {

                // Add it to the list of files

                lstPhotos.Items.Add(Filename);

            }

        }

    }

    // We want the ProgressBar to have the same maximum value as the number of pictures to resize

    prgReduce.Maximum = lstPhotos.Items.Count;

}
Being commented, the code should be pretty easy to figure out. All we do is loop through the files in the directory and if they have the jpeg/jpg extension, we add them to the list.
So let’s move on to the click event of btnReduce, where the second and final piece of code exists, which is more interesting since its the actual code that reduces the quality:
private void btnReduce_Click(object sender, EventArgs e)

{

    // Reset the progress bar

    prgReduce.Value = 0;

    // Show the FolderBrowserDialog where the user selects where to save the files

    if (fbdSave.ShowDialog() == DialogResult.OK)

    {

        // We will store the correct image codec in this object

        ImageCodecInfo iciJpegCodec = null;

        // This will specify the image quality to the encoder

        EncoderParameter epQuality = new EncoderParameter(System.Drawing.Imaging.Encoder.Quality, (int)numQual.Value);

        // Get all image codecs that are available

        ImageCodecInfo[] iciCodecs = ImageCodecInfo.GetImageEncoders();

        // Store the quality parameter in the list of encoder parameters

        EncoderParameters epParameters = new EncoderParameters(1);

        epParameters.Param[0] = epQuality;


        // Loop through all the image codecs

        for (int i = 0; i < iciCodecs.Length; i++)

        {

            // Until the one that we are interested in is found, which is image/jpeg

            if (iciCodecs[i].MimeType == "image/jpeg")

            {

                iciJpegCodec = iciCodecs[i];

                break;

            }

        }


        // Loop through the files in the list

        foreach (string strFile in lstPhotos.Items)

        {

            // Take another step on the progress bar

            prgReduce.PerformStep();


            // Create a new Image object from the current file

            Image newImage = Image.FromFile(strFile);


            // Get the file information again, this time we want to find out the extension

            FileInfo fiPicture = new FileInfo(strFile);

            // Save the new file at the selected path with the specified encoder parameters, and reuse the same file name

            newImage.Save(fbdSave.SelectedPath + "\\" + fiPicture.Name, iciJpegCodec, epParameters);

        }

    }

    // Open the folder containing the new items

    System.Diagnostics.Process.Start(fbdSave.SelectedPath.ToString());

}
What this code does is to retrieve the correct image codec for JPEG files; we will need it in order to change the quality of the file. The code can be improved nicely if put into its separate class and into its separate thread. It would also help the progress bar act more smoothly.
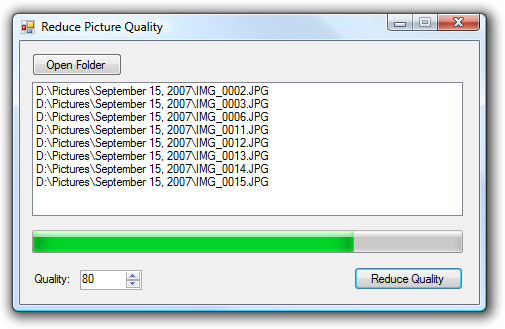
Compile the application and run. You just built yourself a little JPEG processing application:


