Learn how to create your own file and folder monitoring application in C# using the FileSystemWatcher object. A sample application will be built in .NET 2.0 which can be used to monitor files, folders or drives.
Wondering what’s cranking your harddisk so hard? Using C# (.NET 1.1 or 2.0, whichever you prefer) and the FileSystemWatcher object you can easily build yourself a file monitoring application. You’ll be able to see what files are being created, changed, renamed or deleted.
First we’re going to write a few lines of code to quickly see how the FileSystemWatcher object operates. Then after we get the hang of it, we’ll be building a simple Windows application that monitors a folder (or drive) for changes and writes the events to a log.
Working with FileSystemWatcher Start by creating a Windows Application in Visual Studio 2005. Note that Visual Studio 2003 and .NET 1.1 can also be used for this project, but the one attached to this tutorial is created in Visual Studio 2005 and .NET 2.0, thus you won’t be able to open it using an earlier version.
Browse the toolbox for the FileSystemWatcher object, and drag it to the form.

Name it fileWatcher and since you’re in the Properties window let’s check the properties:
First, make sure the EnableRaisingEvents property is set to True otherwise the monitoring will not be enabled. The Filter property should either be set to . or to an empty string. This assures that we’re not filtering any files, and we want to monitor each and every one of them.
Since we want to see some action, let’s include subdirectories in the file monitoring, so set IncludeSubdirectories to True.
The NotifyFilter property should be left with its default value – FileName, DirectoryName, LastWrite.
As for the Path property, you’ll probably want to enter C:\ since it’s such a frequently accessed drive.
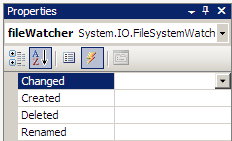
Now switch to the events view and you can see the 4 events of the FileSystemWatcher object. As their name implies, the events are being fired when a file is changed, created, deleted or renamed.

Doubleclick the first field (Changed) and you’ll get to the event handler fileWatcher_Created(). Since this event is being fired when a file is changed, we want to be made aware of that. Thus, replace the event handler with the following code:
private void fileWatcher_Changed(object sender, System.IO.FileSystemEventArgs e)
{
MessageBox.Show(e.ChangeType + ": " + e.FullPath);
}
You can compile your application now. Once something is changed in C:\ a message box will popup showing the path to the file that suffered the change. It normally shouldn’t take very long before this type of event occurs. You can try modifying a file on C:\ yourself, to see the event being fired.
You can do the same thing for the other events (Created, Deleted and Renamed). Double click them to get to the event handler, and paste the same MessageBox.Show() line.
The Rename event has two more properties unlike the other events: OldFullPath and OldName, which show the path / name of the file before it was renamed:
private void fileWatcher_Renamed(object sender, System.IO.RenamedEventArgs e)
{
MessageBox.Show("Renamed from " + e.OldFullPath + " to " + e.FullPath);
}
Creating a file monitoring application Now that you know how to use FileSystemWatcher to monitor a folder or a drive, let’s create a Windows application where we can offer the user greater flexibility on monitoring his files.
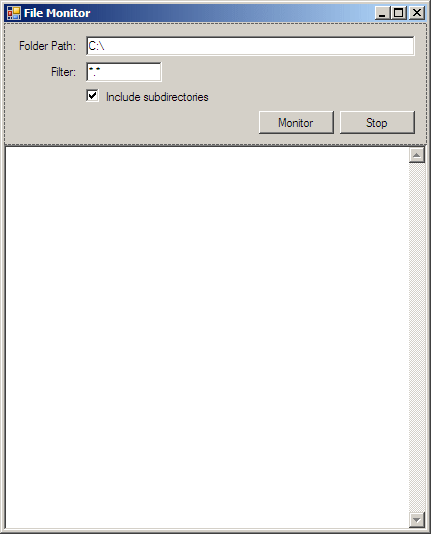
Start a Windows application project in your Visual Studio 2005 evironment. Create a form similar to the one below. There’s a textbox named txtPath where the default value is C:\, there’s another one below named txtFilter that has the default value set to . and a checkbox chkSubdirectories that you’ll want to keep as checked by default.
Then add two buttons (btnMonitor and btnStop) and a multiline textbox that we’re going to use as a log. You might have guessed its name: txtLog.

Now that we have the form ready, we can proceed to coding it.
After you’ve added the FileSystemWatcher object to the project, and renamed it to fileWatcher, in the Properties window set the EnableRaisingEvents property to False, since we don’t want it to start monitoring files right after we fire up the application.
Now switch to the events view and double click the field next to each of the 4 events to create the handlers. Use the following code for the event handlers:
private void fileWatcher_Changed(object sender, System.IO.FileSystemEventArgs e)
{
// Write details to the log
txtLog.Text += e.ChangeType + ": " + e.FullPath + "\r\n";
// Put the focus on the log textbox
txtLog.Focus();
// Put the cursor at the end of the text
txtLog.Select(txtLog.TextLength, 0);
// Scroll to the bottom of the textbox
txtLog.ScrollToCaret();
}

private void fileWatcher_Created(object sender, System.IO.FileSystemEventArgs e)
{
txtLog.Text += e.ChangeType + ": " + e.FullPath + "\r\n";
txtLog.Focus();
txtLog.Select(txtLog.TextLength, 0);
txtLog.ScrollToCaret();
}

private void fileWatcher_Deleted(object sender, System.IO.FileSystemEventArgs e)
{
txtLog.Text += e.ChangeType + ": " + e.FullPath + "\r\n";
txtLog.Focus();
txtLog.Select(txtLog.TextLength, 0);
txtLog.ScrollToCaret();
}

private void fileWatcher_Renamed(object sender, System.IO.RenamedEventArgs e)
{
txtLog.Text += e.ChangeType + ": " + e.OldFullPath + " renamed to " + e.FullPath;
txtLog.Focus();
txtLog.Select(txtLog.TextLength, 0);
txtLog.ScrollToCaret();
}
In each event handler, only one line is used for putting the text in the textbox. The other three lines are necessary for scrolling to the bottom of the textbox after the text was added. This ensures the latest log lines are visible.
What’s left to do is turn this thing on… and off. So double click the btnMonitor and btnStop buttons to get to their event handler. There use the appropriate code for turning the monitoring on and off:
private void btnMonitor_Click(object sender, EventArgs e)
{
fileWatcher.Path = @txtPath.Text;
fileWatcher.Filter = txtFilter.Text;
fileWatcher.IncludeSubdirectories = chkSubdirectories.Checked;
fileWatcher.EnableRaisingEvents = true;
}

private void btnStop_Click(object sender, EventArgs e)
{
fileWatcher.EnableRaisingEvents = false;
}
That’s it.
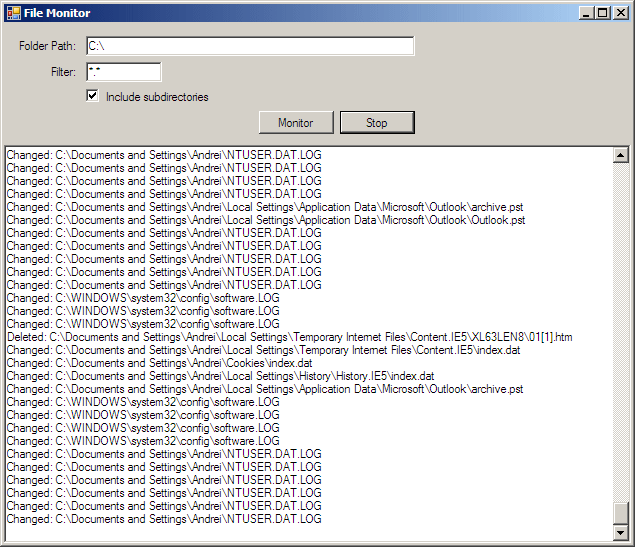
Compile your new file monitoring application and after a few seconds of using your computer, you should see a log screen similar to the following:

By specifying a filter you can monitor only files with a certain extension, or even a single file. For example if you specify index.dat in the filter textbox, only this file will be monitored.


